-

-
My Account
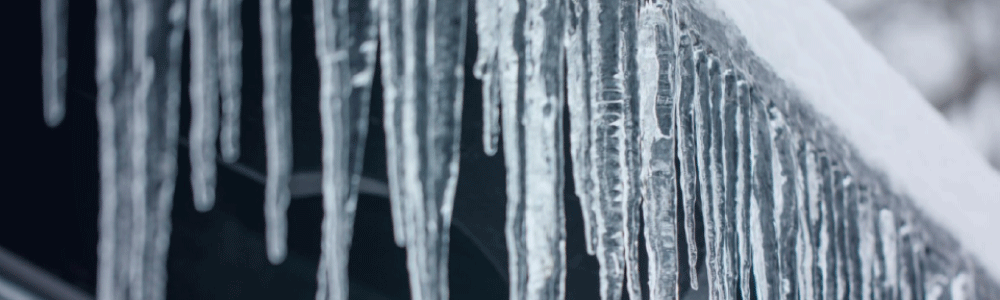
Roof Ice Dams: Icicles are Pretty but Damaging
While icicles glistening from a roof’s edge are beautiful to look at, they can be a sign that ice dams are forming—silent troublemakers that cause serious damage to roofs and walls.
Water intrusion into our sanctuaries, camps, and places of education is a damage amplifier regardless of how it enters a structure. But some water culprits are sneakier than others.
Understanding how an ice dam forms and knowing how to prevent its destructive potential is key to safeguarding ministry buildings.
How an ice dam forms
“Ice dams form in cold weather when there is a layer of snow on the roof,” said Remington Brown, senior engineering director with the Insurance Institute for Business and Home Safety® (IBHS).1
According to the IBHS, ice dams are created through this process:
-
Heat rises and warms the roof, except at the roof’s edge. The overhang or eaves tend to be the coldest because they extend past the warm interior of the house and don’t benefit from structural heat.
-
Snow melts a bit on the warm roof. Water runs under the snow down to the roof edge. The water then refreezes under the snow sitting atop the cold eaves and forms a thin layer of ice.
-
The built-up ice forms a dam. The dam expands to the point where it holds back a pool of water coming down the roof.
-
Pooled meltwater forces its way under the roof coverings. From there, the water may find its way into the building and down the walls.

Clearing ice dams: Three Do’s and Three Don’ts
Matt Parmerlee, manager, risk control services for Brotherhood Mutual, said that keeping heavy snow loads off your roof reduces both ice dam formation and roof failure due to the weight of snow and ice. He offers these do’s and don’ts for ministries.
Do:
-
Clear gutters before the first snow. Thoroughly clear all leaves, sticks and other debris from ministry buildings' gutters and down spouts in the fall. This allows melting roof snow to flow unobstructed into gutters and through down spouts.
-
Invest in a roof rake. These are long-handled devices, ideally made of plastic and with wheels that let you stand on the ground and pull the snow off the roof. The wheels keep the blade of the rake above the roof cover to minimize scraping. Start at the edge of the roof—not at the top—and work in sections to pull the snow down. Never use a roof rake while standing on a ladder or on the roof itself. Use extreme caution with your footing, and avoid any areas where power lines enter your home. Consider hiring an established, licensed, insured professional to remove the snow.
-
Use heated cables. Attached with clips along the roof’s edge in a zigzag pattern, heated cables help prevent ice dams that lift shingles and cause leaks. This solution allows you to equalize your roof’s temperature by heating it from the outside instead of blowing in cold air from the inside. Be sure to install the cables before bad weather hits. The IBHS recommends you use professionally installed, high-quality heating cables on eaves, gutters, and downspouts, or around roof drains on flat roofs. Make sure the heating cables are UL Listed, FM Approved, or CSA Certified. These cables won’t remove an ice dam, but they will create effective channels that allow water to drain off safely.
Don’t:
-
Try to solve the problem while ON your roof. It’s dangerous, slippery, and you’ll likely create more damage than you fix.
-
Hack away at ice dams. While an icicle-adorned roof is the stuff of winter wonderland postcards, they contribute to ice damming. However, breaking off icicles or hacking away at an ice dam can do untold structural damage to your roof system, including gutters, underlayment, and covering.
-
Never toss salt or other chemicals on your roof. These can create additional damage by causing corrosion to gutters and roof coverings.
Evaluate the insulation and ventilation in your attic.
According to the National Weather Service2, most experts agree the R-value of attic insulation should be at least R-30 (R-38 is preferable in northern climates). Good airflow under the eaves and through the roof vents is essential. The insulation prevents heat loss from the building’s interior. The goal is for the attic air to stay cold enough to prevent or minimize the freezing and thawing cycle on the roof.
If you notice persistent ice damming, or want to make proactive improvements, contact a local, licensed roofing pro. Fortunately, there are many ways to mitigate ice dams. These include proper attic ventilation, increased attic insulation, and sealed ceiling openings so that the warm air in the house can’t rise into the attic.
1 “Ice Dams: Prevent Them and Your Roof Will Thank You.” Insurance Institute for Business & Home Safety, 8 January 2018, https://ibhs.org/ibhs-news-releases/ice-dams-prevent-them-and-your-roof-will-thank-you.
2 “Preventing Roof Ice Dams.” National Weather Service, National Oceanic and Atmospheric Administration, https://www.weather.gov/grr/roofIceDams. Accessed 22 November 2023.
Posted December 1, 2023
The information provided in this article is intended to be helpful, but it does not constitute legal advice and is not a substitute for the advice from a licensed attorney in your area. We strongly encourage you to regularly consult with a local attorney as part of your risk management program.
Request A Quote
Thank you for your interest in Brotherhood Mutual. We appreciate the opportunity to provide your church or other ministry with an insurance quote and will reply to your request as soon as possible.
Submit Your Question
Text to follow...
-